Appearance
Code examples
Draw a floor plan GeoJSON using MapLibre
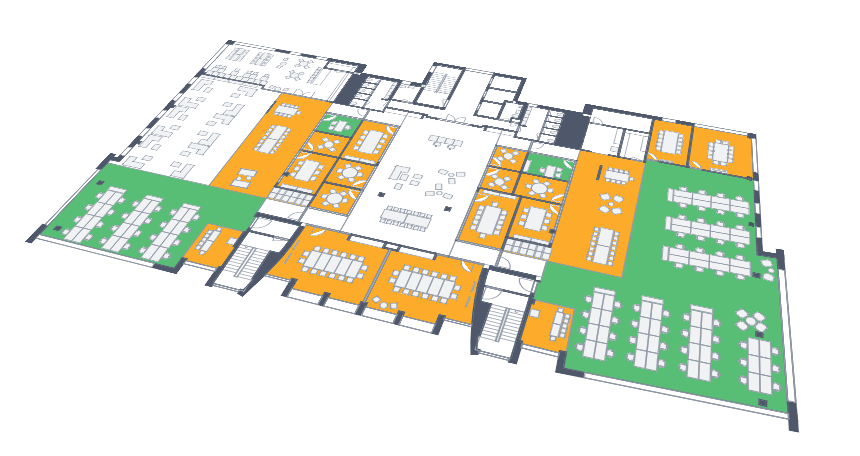
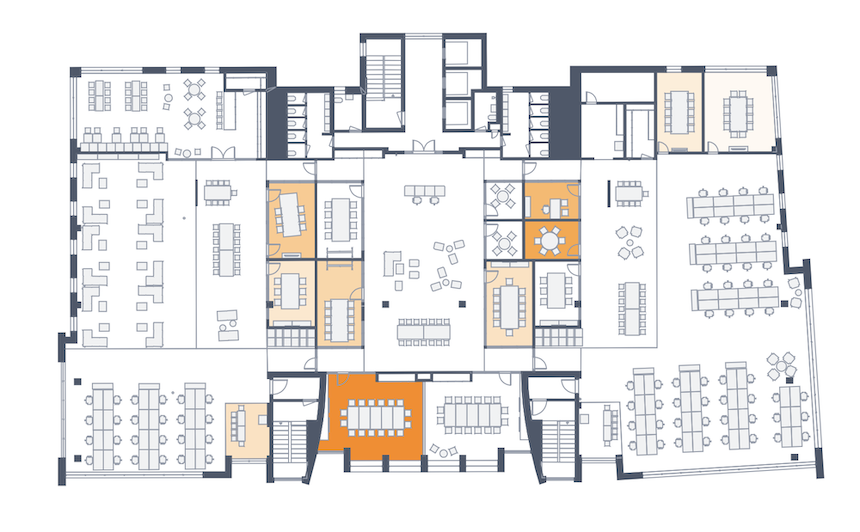
In this demo we use MapLibre GL JS to draw a detailed floor plan in GeoJSON format on the map that were loaded from the REST API.
TIP
If the floor plan is not geo-referenced it will appear at LatLng = [0, 0]
You can geo-reference your floor plan in the Editor
Load the GeoJSON geometry
Use the GeoJSON get request to load the geometries of the floor. Make sure to set the includeAllElements param to include all elements of the layout.
ts
const publishableAccessToken = '<your-token>'
const floorId = '<your-floor-id>'
const endpoint = 'https://api.archilogic.com/v2'
const url = `${endpoint}/floor/${floorId}/geo-json?includeAllElements=true&pubtoken=${publishableAccessToken}`

fetch(url)
  .then(res => res.json())
  .then(drawMap)
  .catch(console.error)
Create the map
Create your mapibre gl instance, with or without a map layer.
ts
import 'maplibre-gl/dist/maplibre-gl.css'
import maplibregl from 'maplibre-gl'

const container = document.getElementById('map')
const map = new maplibregl.Map({
  // optionally add a map layer
  container,
  center: [0, 0],
  zoom: 19,
  maxZoom: 25,
  maplibreLogo: false
})
Draw the GeoJSON on the map
To draw the GeoJSON features on the map, add it as a GeoJSON source and use separate layers to draw shapes and lines. The mapLibre style spec offers lots of options to either map to the default styles or adjust styling, depending on feature parameters.
ts
function drawMap(geoJson) {
  const floor = geoJson.features.find(feature => feature.properties.resourceType === 'Floor')
  map.setCenter(floor.properties.origin)
  map.addSource('floorPlan', { type: 'geojson', data: geoJson })

  // Add fills and lines, using the included 'simplestyle' styles from the geojson features
  map.addLayer({
    id: 'fills',
    type: 'fill',
    source: 'floorPlan',
    filter: ['==', ['geometry-type'], 'Polygon'],
    paint: {
      'fill-color': [
        // Apply a custom fill to spaces with certain property values
        'match',
        ['get', 'program'],
        'work',
        '#54c072',
        'meet',
        '#ffab00',
        // Default use the give fill color
        ['get', 'fill']
      ]
    }
  })

  map.addLayer({
    id: 'lines',
    type: 'line',
    source: 'floorPlan',
    paint: { 'line-color': ['get', 'stroke'] }
  })
}
Open code sample on StackBlitz 

Draw the GeoJSON, highlight spaces by custom attribute values
Spaces or any resources can be also colored by custom attribute values.
TIP
The simplest way to add custom attribute definitions for your account is via the Dashboard settings. Once the definitions are created you can then add values by using the editor.
In the example below, spaces are highlighted depending on the value of the custom attribute usage-count
ts
map.addLayer({
  id: 'fills',
  type: 'fill',
  source: 'floorPlan',
  filter: ['==', ['geometry-type'], 'Polygon'],
  paint: {
    'fill-color': [
      'case',
      // If OccupancyPct is set
      ['has', 'OccupancyPct', ['get', 'customAttributes']],
      [
        'interpolate',
        ['linear'],
        ['get', 'OccupancyPct', ['get', 'customAttributes']],
        10,
        '#ffffff',
        85,
        '#ffcc99',
        100,
        '#ee5500'
      ],
      // default style
      ['get', 'fill']
    ]
  }
})
Open code sample on StackBlitz 

Update a layout via the operations API
With the following examples we explore the usage of the layout operations endpoint which allows updating or creating nodes in a layout. Each call will create a new layout revision based on the latest published revision.
It requires floor:update scope.
SpaceUpdate
Update the attributes of a space node
Type
ts
type SpaceUpdateOperationJson = {
  type: 'operation:spaceUpdate'
  nodeId: string
  value: {
    name?: string
    customId?: string
  }
}
Example
Update the custom id of a space
ts
const operations = [
  {
    type: 'operation:spaceUpdate',
    nodeId: '<space-id>',
    value: {
      customId: 'ABC-123'
    }
  }
]

const authorization = `Bearer ${secretToken}`

await fetch(`https://api.archilogic.com/v2/layout/:layoutId/operations`, {
  method: 'POST',
  headers: {
    'Content-Type': 'application/json',
    authorization
  },
  body: JSON.stringify({ operations })
})
ElementUpdate
Type
ts
type ElementUpdateOperationJson = {
  type: 'operation:elementUpdate'
  nodeId: string
  value: {
    name?: string
    customId?: string
    position?: [number, number, number] // [x, y, z] right handed coordinate system, y is up
    rotation?: number // rotation in degrees around the y axis
    product?: string
  }
}
Example
Change the product definition for one asset, the position and custom attribute value for another. To create or update custom attribute definitions either use the UI or the corresponding REST endpoint
ts
const operations = [
  {
    type: 'operation:elementUpdate'
    nodeId: '<asset-id-1>'
    value: {
      product: '<new-product-id>'
    }
  },
  {
    type: 'operation:elementUpdate'
    nodeId: '<asset-id-2>'
    value: {
      position: [2.5, 0, 0],
      customAttributes: {
        '<attribute-id>': 'attribute-value'
      }
    }
  }
]

const authorization = `Bearer ${secretToken}`

await fetch(`https://api.archilogic.com/v2/layout/:layoutId/operations`, {
  method: 'POST',
  headers: {
    'Content-Type': 'application/json',
    authorization
  },
  body: JSON.stringify({ operations })
})
ElementCreate
Place a new asset element at a given position
Type
ts
type ElementCreateOperationJson = {
  type: 'operation:elementCreate'
  value: {
    type: 'element:asset'
    id: string
    name?: string
    customId?: string
    position: [number, number, number] // [x, y, z] right handed coordinate system, y is up
    rotation?: number // rotation in degrees around the y axis
    product: string
  }
}
Example
Create a desk and a chair. Product geometries are facing z+. Make sure each new element gets a newly created uuid v4.
ts
const operations = [
  {
    type: 'operation:elementCreate'
    value: {
      type: 'element:asset',
      id: '<new-uuid>',
      position: [0, 0, 0],
      product: '<desk-product-id>'
    }
  },
  {
    type: 'operation:elementCreate'
    value: {
      type: 'element:asset',
      id: '<new-uuid>',
      position: [0, 0, 0.6], // move the desk in front of the desk
      rotation: 180, // make the chair face the desk
      product: '<chair-product-id>'
    }
  }
]

const authorization = `Bearer ${secretToken}`

await fetch(`https://api.archilogic.com/v2/layout/:layoutId/operations`, {
  method: 'POST',
  headers: {
    'Content-Type': 'application/json',
    authorization
  },
  body: JSON.stringify({ operations })
})
ElementRemove
Remove an asset element from a layout
Type
ts
type ElementRemoveOperationJson = {
  type: 'operation:elementRemove'
  nodeId: string
}
Example
ts
const operations = [
  {
    type: 'operation:elementRemove'
    nodeId: '<asset-id>'
  }
]

const authorization = `Bearer ${secretToken}`

await fetch(`https://api.archilogic.com/v2/layout/:layoutId/operations`, {
  method: 'POST',
  headers: {
    'Content-Type': 'application/json',
    authorization
  },
  body: JSON.stringify({ operations })
})
Access private resources from front end
The following example demonstrates how to access a private floor from the front end using temporary access tokens and the floor plan engine.
Get the temporary access token
Create an API on your back-end to retrieve temporary access tokens
js
app.post('/api/get-access-token', async (req, res) => {
  // https://developers.archilogic.com/space-api/v2/introduction.html#temporary-access-token
  const apiUrl = 'https://api.archilogic.com/v2/temporary-access-token/create'
  const { body } = await got.post(apiUrl, {
    headers: {
      Authorization: `Bearer ${process.env.SECRET_TOKEN}`
    },
    json: {
      scopes: [{ resource: 'floor', action: 'readPrivate' }],
      durationSeconds: 3600
    },
    responseType: 'json'
  })
  res.send(body)
})
Use the temporary access token
Make your front end call that API and use the token then via the loadScene method
js
function getTemporaryAccessToken() {
  return fetch(`/api/get-access-token`, {
    method: 'POST',
    headers: {
      'Content-Type': 'application/json'
    },
    body: JSON.stringify({
      scopes: [{ resource: 'floor', action: 'readPrivate' }]
    })
  }).then(response => response.json())
}
// authorization contains the temporary access token
// expiresAt can be used to check on when you need to request an new token
const { authorization, expiresAt } = await getTemporaryAccessToken()
const floorId = 'bc78475e-0236-4b8d-9d7e-b4f46cd3f6fa'
const container = document.getElementById('hello-plan')
const floorPlan = new FloorPlanEngine({ container })
await floorPlan
  .loadFloorById(floorId, { temporaryAccessToken: { authorization, expiresAt } })
  .catch()
